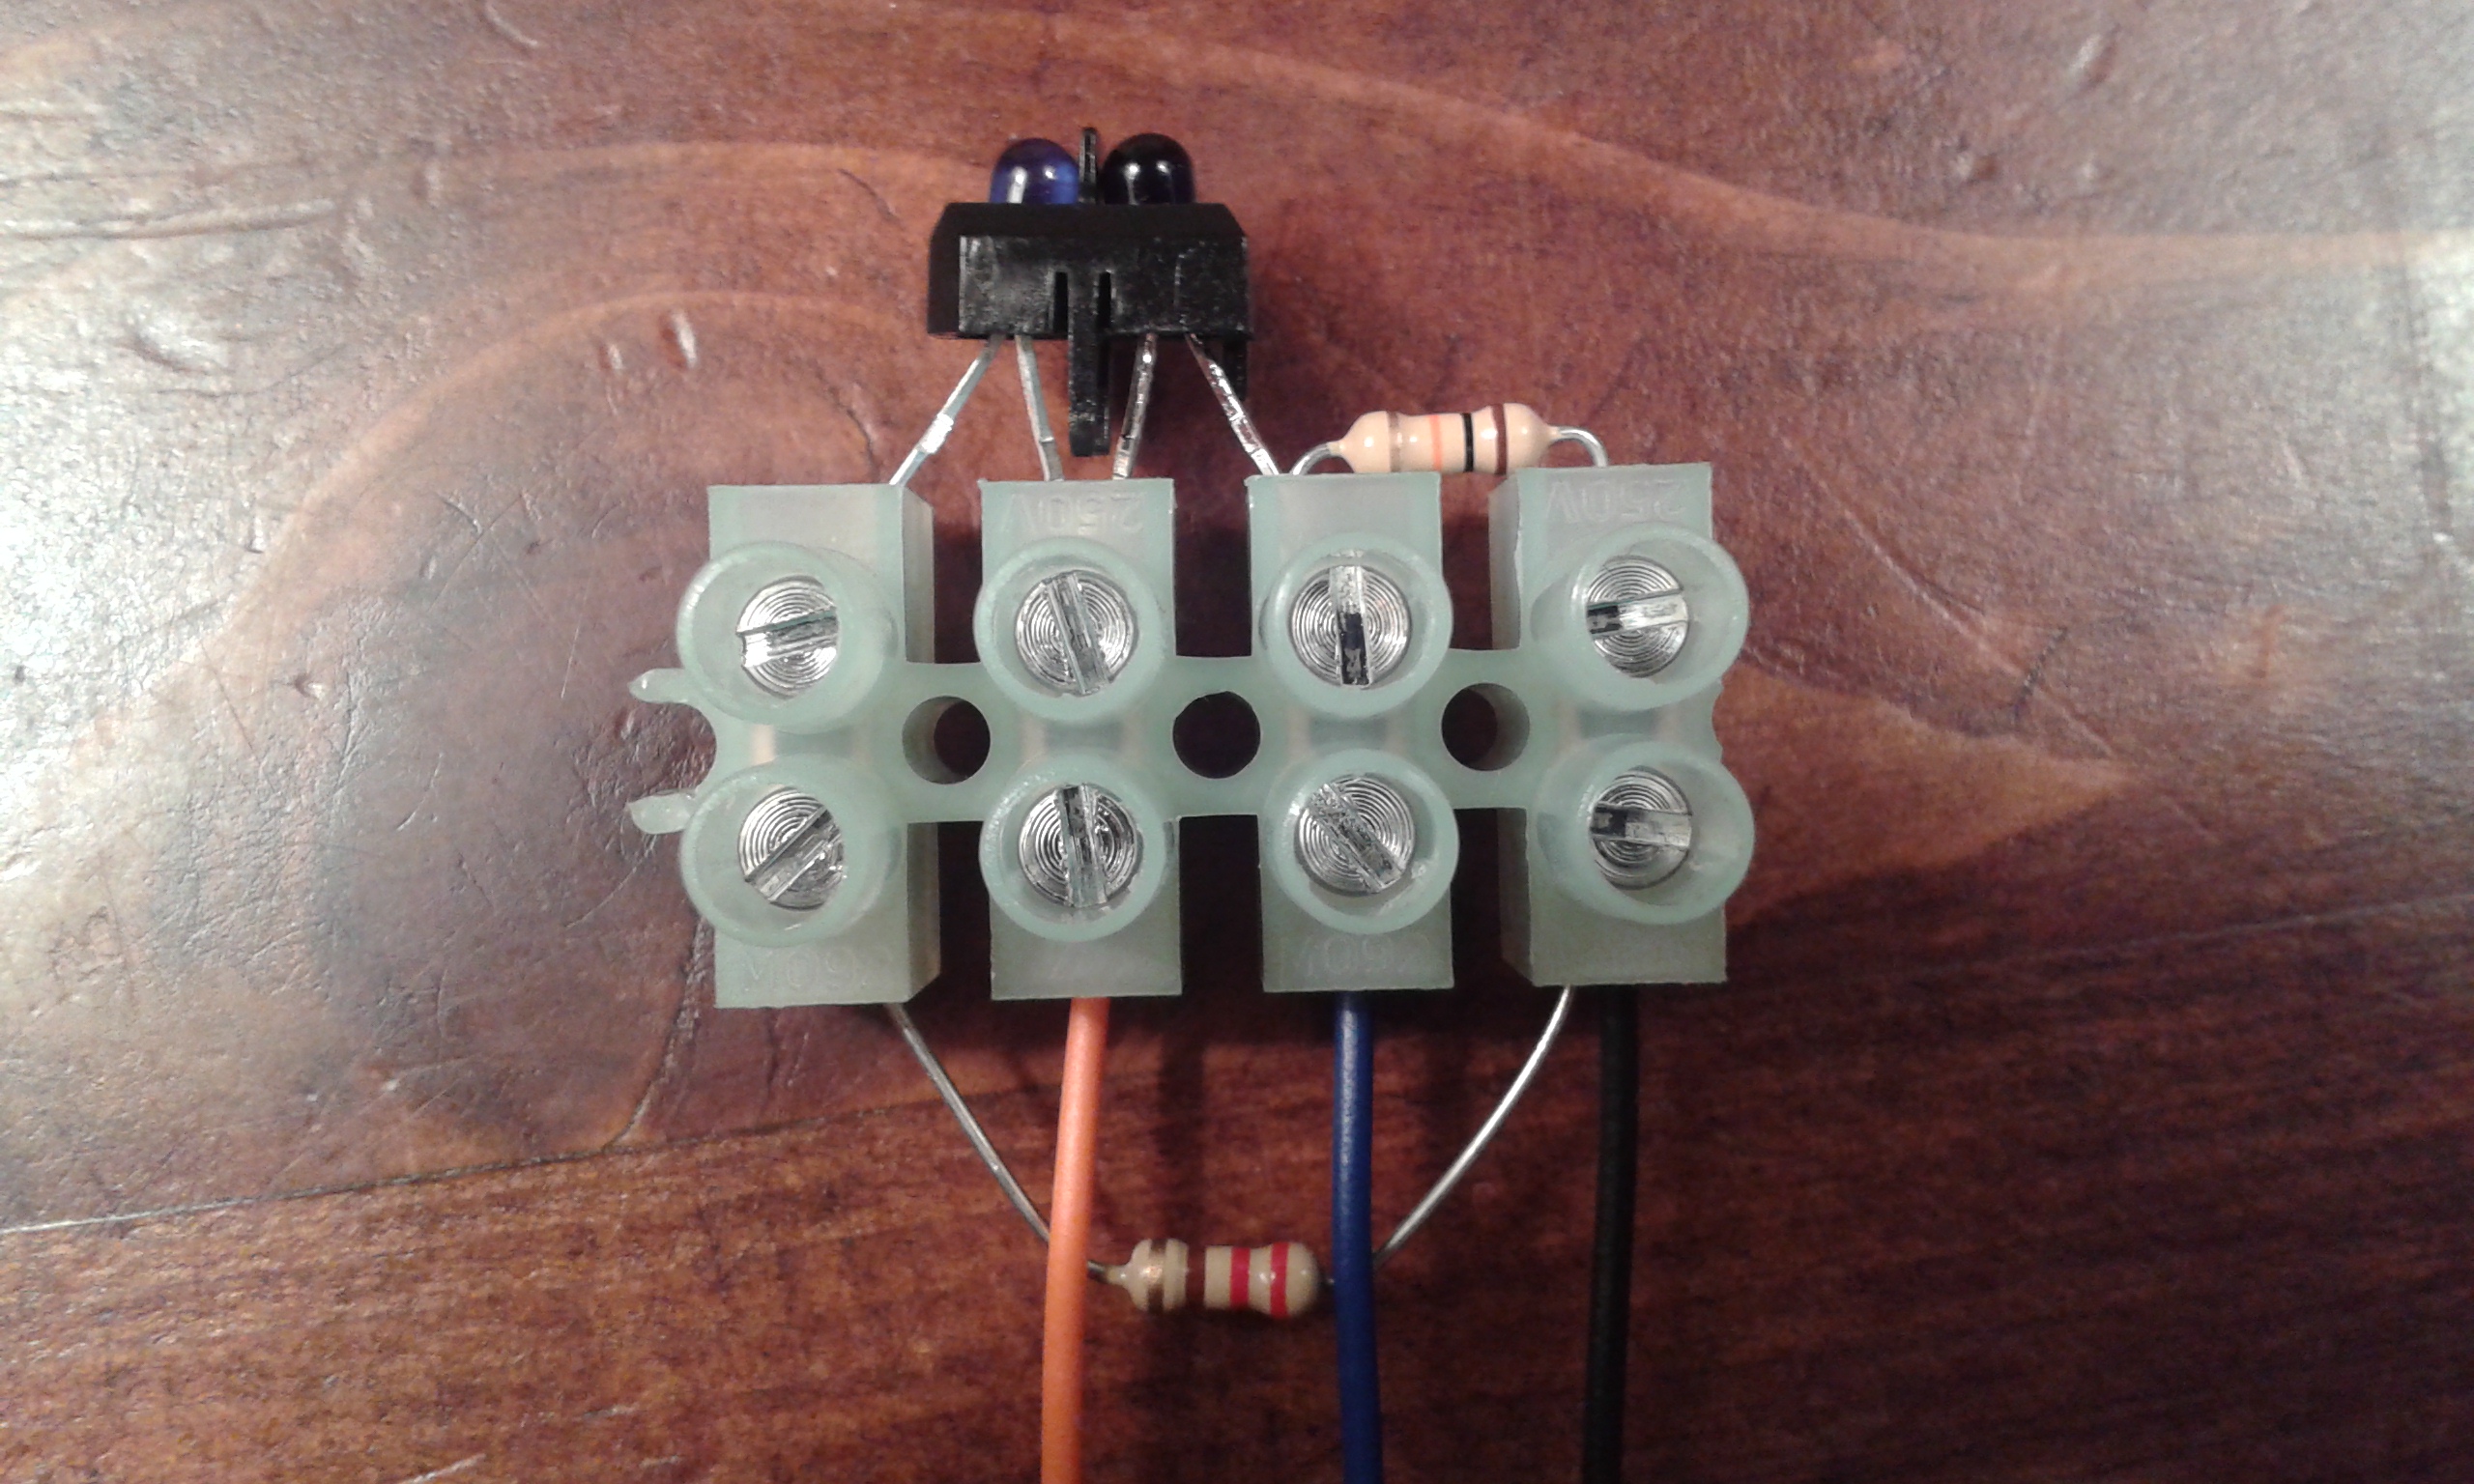
The TCRT5000 is an infrared reflective sensor in a small black plastic casing with four legs, with one “blue eye” and one “black eye”. The blue eye is an infrared LED which emits a beam of infrared light when electric current flows through it. The black eye is a phototransistor which detects infrared light. When the sensor is close to a surface, some of the emitted light is reflected back and detected by the phototransistor, but the amount of light reflected back depends on the colour of the surface. This can be used to sense the colour of a surface. This article explains how to use the TCRT5000 (with resistors, wires and terminal block) to build a 3-wire colour sensing module.
- Lay out the parts shown in the image below. The three wires visible at the bottom of the image are the long red, blue and black wires.
- “TCRT5000” is written in tiny letters on one side of the colour sensor – make sure that side is facing downwards (towards the table).
- The two legs of the TCRT5000 that are now higher off the table (i.e. closer to the camera in the image below) should be carefully bent towards each other until they meet.

Insert the components and wires into the terminal block as shown in the images below and tighten each terminal with a screwdriver to hold them all in place.


To connect the sensor module to an Arduino breadboard circuit, connect the three wires as follows:
- Connect the red wire to the positive (red) rail.
- Connect the black wire to the negative (blue) rail.
- Connect the blue wire to an analog input pin on the Arduino, e.g. pin A0.
